Photography relies on many branches of knowledge and technology more than other creative medium put together. Knowledge on the hardware, the processes and the subject matter greatly influence the work we do in photography. Most of us are not aware the hidden processes behind clicking the shutter on any digital camera are more complex than any other system we have ever experienced.
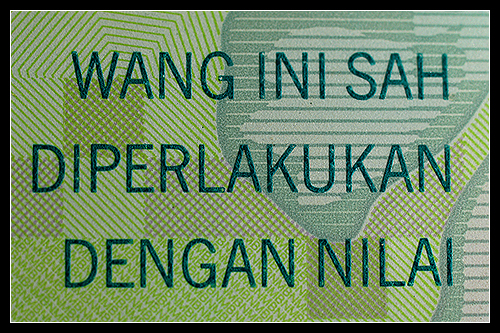
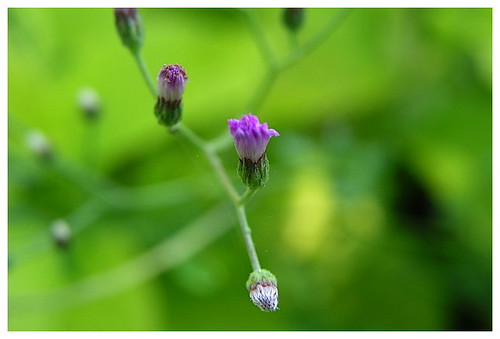
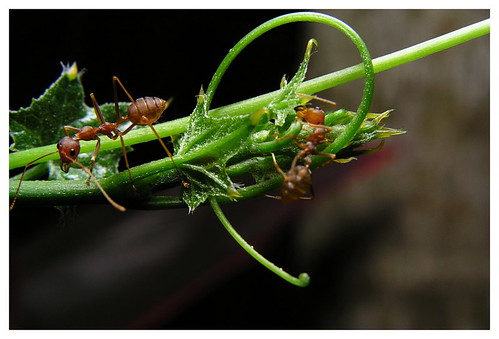
 Olympus C5050z @ 55mm EFL f8 2sec ISO64
Photography can be associated to almost every knowledge known to mankind - arts, psychology, social science, optics, mechanical engineering, physics, maths, geometry, electronics, computer engineering,
fuzzy logics,
adaptive control systems,
multivariable nonlinear system just to name a few.
Some fields in which most ppl never even have ever heard before such as
psychophysics can be associated with photography.... just imagine that and the list could be very long.
However, the canny wizard in photographic industry have simplified the art of taking pics so the only requirement imposed on the photographer is just clicking the shutter. The hidden processes are left unnoticed to the CPU in the camera. We can take pictures like this...... but the result is usually average pictures of average scene. If we are lucky enough we may get good or great shot by chance, but "photography" in real sense does not rely on luck! Knowledge and skill must be developed for great picture taking. Some level of understanding beyond clicking the shutter is required to take picture that are more satisfying.... simply means that our picture fulfills the purpose we had in mind when we took it.
If we take photography as a hobby - its not the final prints that we enjoy most, lemme put this way - it's not the destination, but the journey. Plainly the fun is in the doing, not the end result. We photographers, who are seriously into it as a hobby or profession, find as much rewarding in the things that lead to a photograph as in the final end product. This is manipulation, puzzle solving and complex problem solving...
uncle.D ANSWERS to simple FAQ on Photography - based on reader comments and questions sent to regular forums, e-mails
Q. What is the difference between a Tele-converter and an Extension Tube?
Teleconverter
is an optical device that fits between the camera body and the lens - used to increase the effective focal length of a lens. Also called a tele-extender or converter.
Magification Factors
1.4x teleconverter is equivalent to a 40% lens extension. For example, a 200mm lens becomes the equivalent of a 280mm lens.
2x teleconverter is equivalent to a 100% lens extension. For example, 200mm lens becomes the equivalent of a 400mm lens.
In other words a teleconverter is actually a focal length multiplier. As simple as that, but the effective f-number is reduced accordingly.
Extension Tubes
On the other hand the "Extension Tubes" or "Extenders" are designed to enable a lens to focus closer than its normal set minimum focusing distance. Getting closer has the effect of magnifying the objects (making it appear larger in the viewfinder and in the pictures). They are exceptionally useful for macro photography, enabling to convert almost any lens into a macro lens at a fraction of the cost while maintaining its original optical quality. The extension tubes have no optics - therefore no effect on focal lengths. They are mounted in between the camera body and lens [same way as the teleconverter]. Only effective for lenses having short focal lengths [i.e shorter than 70mm] though.
By mounting a 15mm extension tube between the lens flange and the camera, the later can be moved closer to the object for larger magnification...
 Zuiko 50mm f1.2 with 15mm extension tube
Q. How to shoot outdoor portraits that look like taking pictures in a studio?
Zuiko 50mm f1.2 with 15mm extension tube
Q. How to shoot outdoor portraits that look like taking pictures in a studio?
Taking portraits is the most difficult sector in photography, at least for me. I'd spent most of my life as an armature taking tens of thousand ppl pictures and human dramas but never really satisfy with the results that forced me to change my interest to
nature and wildlife photography after migrating to digital. The only frustration is failure to get the exact skin color/tone besides the right composition and capturing the right moment for great shots.
Generally speaking studio portraits are clear and sharp - mostly are not great shots at all though. No story!. Not much different from still-life photography. They differ from outdoor portraits in that they tend to be more deliberate, more formalised and more controlled. The subject is being brought to the location - in particular the lighting can be perfected but not natural.
For newbies the starting confrontation with the ppl to be photographed can sometimes be a little unnerving - waiting to be directed and expecting you to make all the decisions. It is advisable for you to start by photographing ppl you know well...
With outdoor portraits, you should make some rudimentary decision about what you want the picture to show, i.e what aspect of the subject's personality or appearance you want to depict. The success of the outcome can depend on a mix of elements, including:
the relationship between the photographer and the subject,
the composition,
the subject pose and mood
the lighting
Technical matters such as the camera settings, the choice of lenses, etc. also have an obvious effect - these are normally straight forwards. Knowledge and skill must be developed for great picture taking. Some level of understanding beyond clicking the shutter is required to take picture that are more satisfying.... simply means that ur picture fulfills the purpose u had in mind when u took it.
Q. What is DOF and BOKEH?
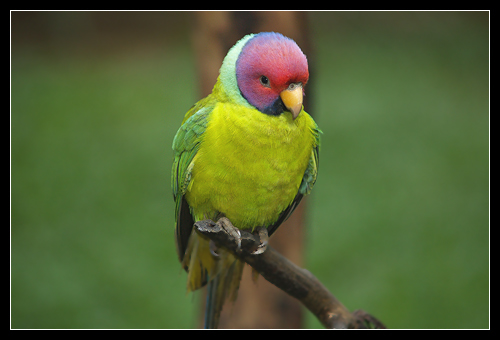
Depth of field (DOF) is the area of an image that is in focus. BOKEH [pronoun as b
o-ke'] is the opposite i.e the appearance of the blured background/foreground of the main object. BOKEH and shallow DOF are important when we need the main subject to stand-out against the background/foreground].
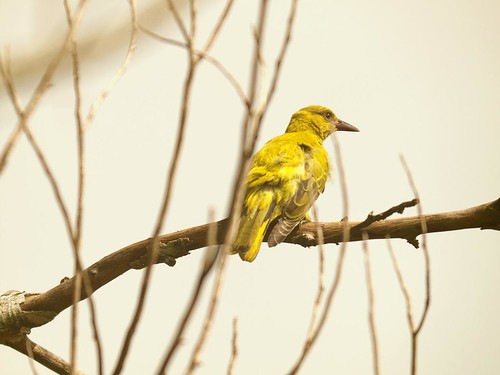
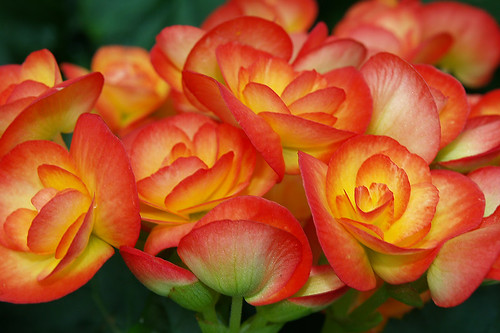
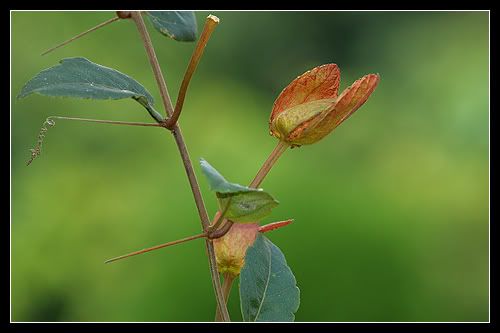
 ZD 40~150mm f3.5/4.5 @ f4.5 1/90sec ISO200 - zoomed to 150mm
Q. Is BOKEH and DOF the same thing?
ZD 40~150mm f3.5/4.5 @ f4.5 1/90sec ISO200 - zoomed to 150mm
Q. Is BOKEH and DOF the same thing?
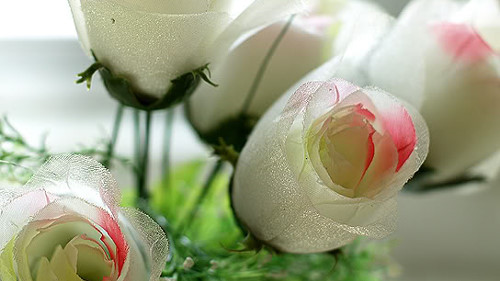
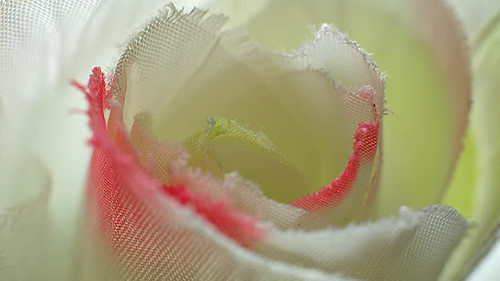
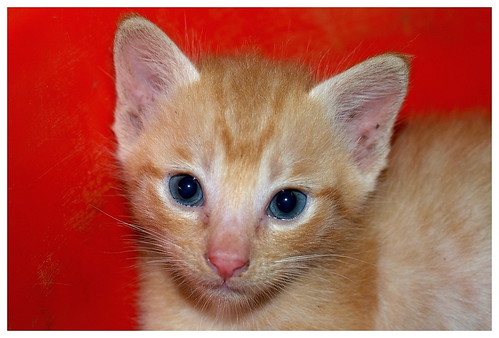
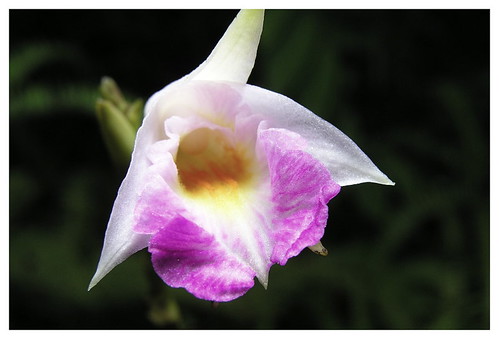
No, BOKEH and DOF are not the same. They 'co-exist' to complement each other though. DOF is seen in a photograph where there is an obvious focus area, set against BOKEH, i.e the blured background/foreground].Good BOKEH should be soft and pleasing colors in contrast with the foreground colors. Green BOKEH is suitable for red, orange and blue objects...try to avoid using white BOKEH! Black BOKEH for any light objects OK.
Camera settings for bokeh and DOF tips
Preparation for maximum BOKEH [for mid telephoto lenses such as 40~150mm zoom - not applicable for short focal length MACRO lenses]
-aperture fully open
-use the longest focal length available
-move the camera as close as possible towards the main object
-select suitable background colors
Q. Cannot control DOF and create great looking bokeh. Why?
There are times when aperture settings do not produce expected results as if there is no change wrt f-stop selected. When this happens one must examine whether the aperture diaphragm is working.
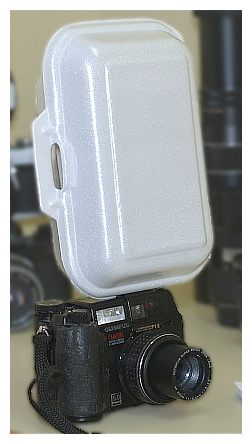
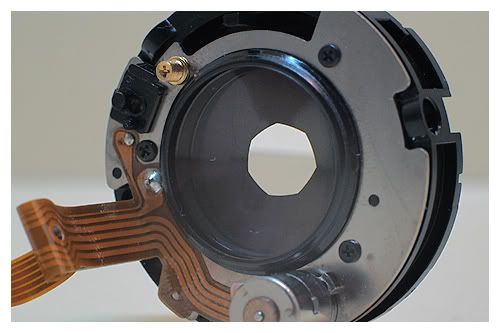 Iris mechanism assembly with jammed aperture leaves taken out of my ZD 45~150mm f3.5/4.5 zoom lens
There is a possiblity the mechanical or/and electronics component in the aperture assembly is/are mulfunction. No matter what are the causes, the complete assembly consisting of a stepper motor, diaphragms, lens elements, etc must be replaced. Not very expensive though as the mechanism is one of the parts vulnerable to fault especially when the photographer always use shutter speed priority mode.
Believe-it-or-not the price for the complete assembly is less than the cost of an HMC filter for the same lens!
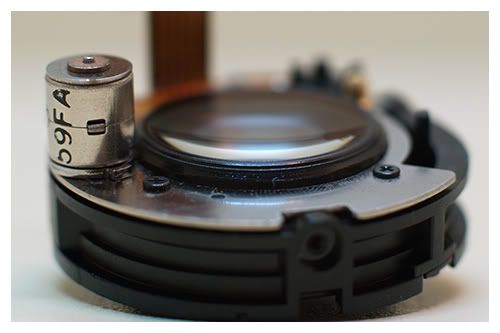 Stepper motor and lens element
Q. Should I use Adobe RGB, but don't know what is it...
Stepper motor and lens element
Q. Should I use Adobe RGB, but don't know what is it...
myths: Adobe RGB having a broader range of colors [?]...
probably in theory and mathematical modelling the answer is "YES".
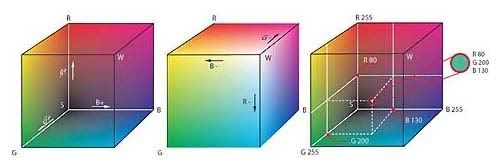 colorspace as seen by a mathematical modelling
I'm also interested about Adobe RGB and other new color spaces . After some wild tests, I found that sRGB is "good enough" for normal photography for me. In fact Adobe RGB is irrelevant for real photography. sRGB gives better (more consistent) results and the same, or even vivid colors. I think using Adobe RGB is one of the leading causes of colors not matching between monitor and print.
Adobe RGB should never be used unless you really know what you're doing and do all your printing yourself. If you really know what you're doing and working in publishing, go right ahead and use it. If you have to ask, don't even try it... he hee! Use Adobe RGB only if you're one of the few a full-time career professional photographers - by all means shoot Adobe RGB, but if you're an amateur like me, beware... wokay? orait beb.
Details
In theory Adobe RGB can represent a wider range (gamut) of colors, however it requires special software and painstaking workflow. Any mistake you get dull colors. You cannot use Adobe RGB on the internet forum postings or send to conventional photo lab printing. The colors will be muted because Adobe RGB squeezes colors into a smaller range before recording them to your file. Special smart software is then needed to expand the colors back to where they should be when opening the file. If you use Adobe RGB you will have to remember to convert back to sRGB for sending your prints out or sharing them on the Internet. Otherwise they look duller than sRGB.
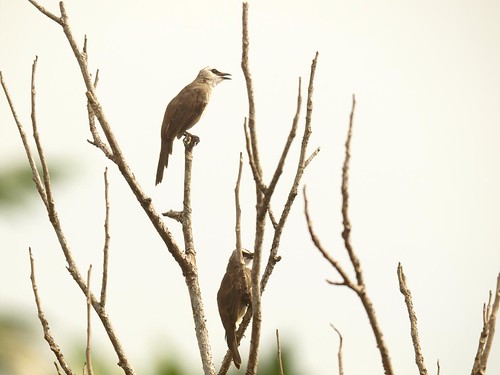
 ZD 40~150mm f3.5/4.5 @ f6.3 1/160sec ISO200 - zoomed to 150mm
Bottom_line
ZD 40~150mm f3.5/4.5 @ f6.3 1/160sec ISO200 - zoomed to 150mm
Bottom_line
No doubt Adobe RGB may be able to represent a slightly larger range of colors, but no screen or domestic printer can show this broader range, so why cause yourself all the trouble? sRGB is the world standard for digital images, printing and the Internet - almost everybody is shooting in sRGB. Use sRGB and you'll get great, accurate colors everywhere all the time. Like what you see in my blog all are coming in sRGB. Use sRGB and you'll automatically get great, saturated and accurate color everywhere.
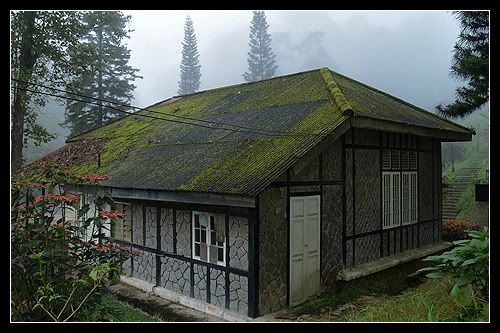 ZD 14~45mm f3.5/5.6 @ f3.5 1/125sec ISO200 - zoom out to 14mm [EFL=28mm]
Q. How to increase magnification with available lenses?
ZD 14~45mm f3.5/5.6 @ f3.5 1/125sec ISO200 - zoom out to 14mm [EFL=28mm]
Q. How to increase magnification with available lenses?
Been taking macro pics up to 2x or 2:1 magnification [wrt 35mm std format] using ZD 35mm f3.5 macro lens for quite some time now.
 ... RM5 [FIVEringgits]
Kinda 'not enough' with the magnification as shown above. I need higher magnification actually...
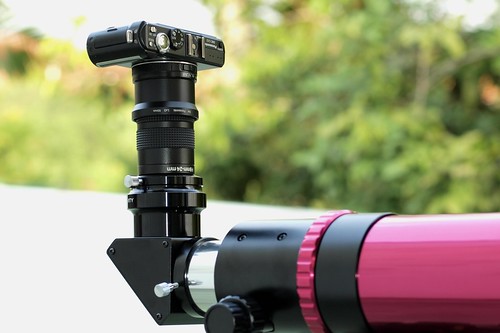
Already started a project for a DIY extender cum lens reversal for higher magnification. By using a base barrel [about 3" long] of an old super telephoto lens c/w "OM" bayonet mounting flange and a matching 52mm filter + MF-1 adapter, finally the project completed in the evening of Dec 19th.
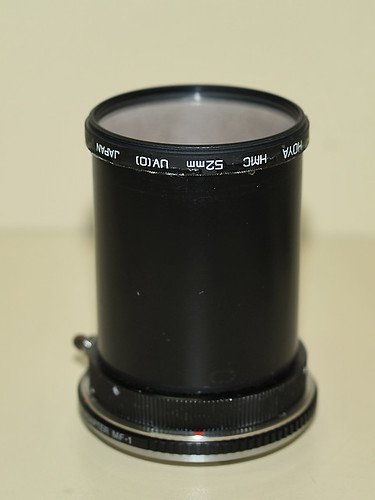
The top portion is the male thread of a 52mm filter [liquid welded to the barrel] to be coupled with the front of the macro lens while the lower part is the MF-1 adapter for the 4-thirds camera mount. Picture below shows how the interface was done..
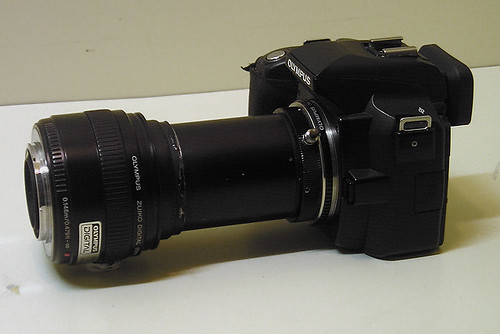
This is the result of an almost 8x or 8:1 magnification wrt 35mm std.
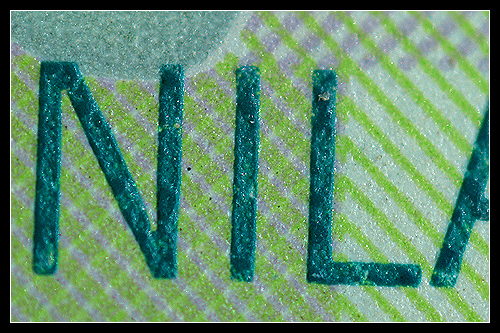
I am pleased with the result and already shared with friends at normal forums. Looking forwards for better and colorful macro shots with this 'innovation'
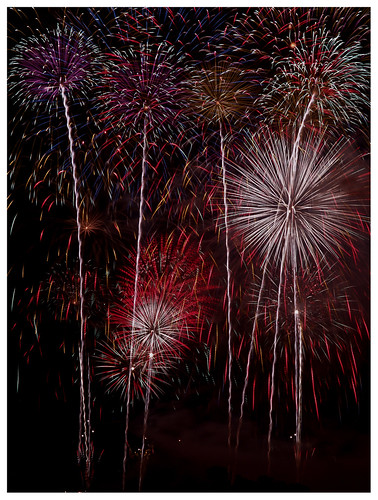
Q. How to capture great looking fireworks?
It was "Merdeka50" i.e the 50th Malaysian National Day. At midnight there were spectacular fireworks at Putrajaya.
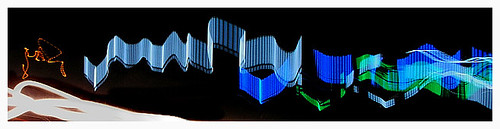
 ZD14~45mm f3.5/5.6 @ f11 10secs ISO100
Taking pictures of fireworks is easy and straight forwards by following simple rules that I'd imposed to myself. Now I would like to share with all
fotokakis.
Rule #1: always use a
TRIPOD
Rule #2: use the
LOWEST ISO setting [ISO100 or less]
Rule #3: use
MANUAL mode with aperture opening at f8 to f16, generally best at f11, [Just like taking pictures with flash units, shutter speeds will no longer determine the exposure of the fireworks itself other than used to capture the trails length and the exposure of the background/foreground, generally anything between 4 to 16 seconds is good enough, I found that the best shutter speed is 8 seconds]
Rule #4: Use
MANUAL FOCUS lens or set auto focus to MAN [if u r using autofocus lenses]
I suggest to use a moderate telephoto lens to keep shooting distance further away from the 'action' and crowds.
To start with, I would suggest the following settings:
MANUAL mode, Camera on TRIPOD
Aperture: f11
Shutter: 8seconds
ISO: 100
And the results as shown below [all of them were taken by my son, K.A Wan] were not disappoint me at all...
 Tokina RMC 135mm f2.8 @ f11 8secs ISO100
 Tokina RMC 135mm f2.8 @ f11 8secs ISO100
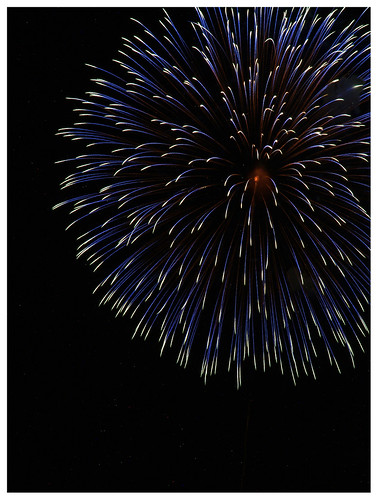 Tokina RMC 135mm f2.8 @ f11 8secs ISO100
To get the better results u may 'play around' up to +- 2stops with aperture [or shutter]. Good Luck
Q. How to set EV for moonPHOTOGRAPHY?
Last night the Moon was 17 days old - i.e the remaining 85% full. The sky was relatively clear with light haze as there was no rain in Klang Valley for the last one week. The Moon was a little bit reddish - not as bright as on previous night.
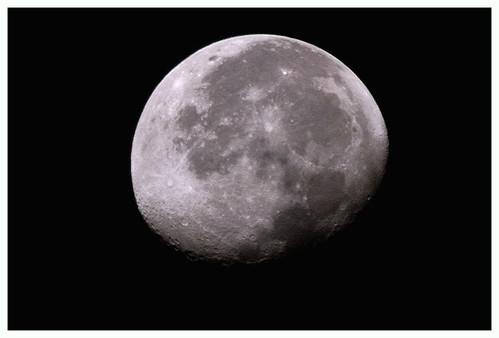 Tuesday July 03rd, 2007
I had to wait in sleep for a few hours past midnite till the Moon was high enough
Tuesday July 03rd, 2007
I had to wait in sleep for a few hours past midnite till the Moon was high enough 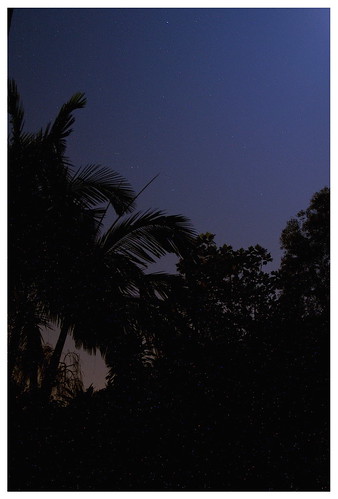 to clear these trees before clicking the shutter
 >>
It was 100% full-moon two nights ago. Unfortunately the sky was "mostly cloudy" at then. Only at the 16th lunar-nite I could see clear sky with the 90% remaining full-moon.
The moon rose up above the horizon at almost 10pm. I had to sleep early in order to wake up at around 4:30am when the moon was at "noon" i.e almost vertically over head. That was the only position at which I could shoot the moon from the roofless balcony as four corners of my house is completely surrounded by 20yrs-old trees of up to 50ft [16m] tall.
The night sky was not perfectly clear though. I had to boost up contrast and sharpness on the camera settings for this shot...

Original date/time: 2007:07:03 04:51:52
Exposure time: 1/60
F-stop: 11
ISO speed: 100
Lens: Danubia [1979]
Focal length: 800mm [EFL]
Flash: -
Exposure mode: Manual
White balance: Auto
Orientation: Top-left
Light source: Unknown
Exposure bias: 0.0000
Metering mode: Center Weighted
Exposure program: Manual
Camera: Olympus E-500
Tips on Shooting the Moon
In contrary to common belief, setting the exposure values [shutter speed and aperture or f-stop] on camera for shooting
the Moon is quite easy and straight forwards. First, we must realise that the light which illuminates the Moon surface is exactly from the same source that we receive on the Earth surface at noon, i.e from the Sun. Thus rule-of-thumb
Sunny-16 can be applied directly when taking pictures of the Moon either in daylight or at night.
The best initial settings [as a guide only]
aperture: f16
shutter speed: 1/ISO sec. - i.e if we select ISO 100 then the shutter speed should be 1/100sec [or anything from 1/90sec to 1/125sec].
After capturing and viewing the picture do minor adjustments on f-stop or/and shutter speed to get the best setting. It is best to shoot the Moon away from the city haze and lights. Preferably after 3:00am. Different phases of the Moon will give different results, especially for the Moon texture or surface details. Full Moon will not show distinct craters as there is no hard shadows. Personally I prefer taking 75% full moon, i.e on the 11th and on the 18th day [note: from 0% to 100% and from 100% to 0% full moon take 14 to 15 days, NOT 30 days]
This pic was taken on the 18th day [last 75% full] at Sabak Bernam, a location far away from the city.
Original date/time: 2006:06:16 05:52:25
Exposure time: 1/30
F-stop: 22
ISO speed: 100
Lens: Danubia [1979]
Focal length: 800mm [EFL]
Flash: -
Exposure mode: Manual
White balance: Auto
Orientation: Top-left
Light source: Unknown
Exposure bias: 0.0000
Metering mode: Center Weighted
Exposure program: Manual
Camera: Olympus E-500
Q. How to determine macro magnification?
MACROphotography with Compact Digital Cameras
Normally MACROphotography is associated with macro lenses and a bundle of accessories or attachments on dSLR. Many articles have been written on this subject. For those who own dSLR with macro lenses are very fortunate and feel happy about this.
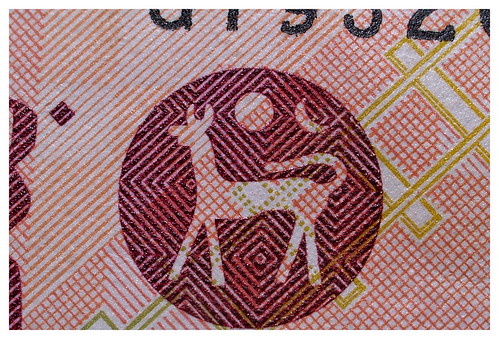
How about people with compact digital cameras? Can they do MACROphotography too? The answer is absolutely *YES! with only one limitation though, i.e most compact digicam can not produce shots of greater than 1:1 magnification. 1:1 magnification [wrt to 35mm film standard] is capturing images of object measuring 36mm x 24mm[or 27mm] full frame, or making copy [i.e duplicate] of 35mm slide on CCD, or capturing 'Agung' full face on RM50 note as shown below.
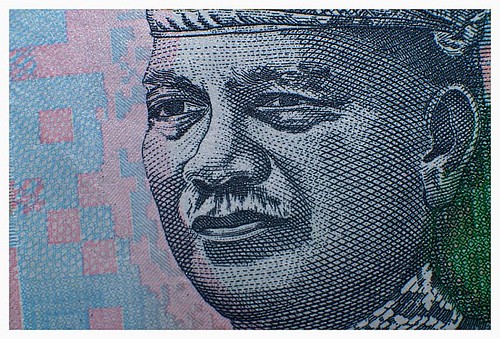
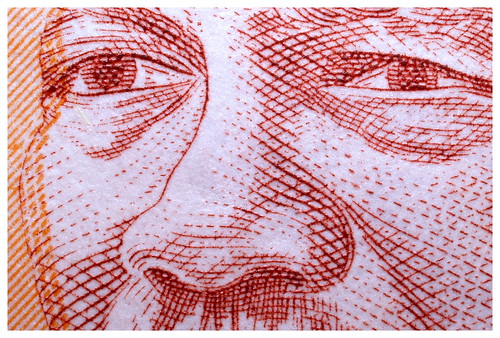
Macro shot with 1:1 magnification,
compare to 2:1 [2x] magnification shown below [taken with a macro-lens]
To be honest, how often do we do magnification of greater than 1:1? More often than not 90% of close-up photos taken are less than 1:4 magnification for shots likes flowers, pets, fruits, birthday cakes, portraits, etc.. for instance taking close-up pictures of one's face [or pet's] is only less than 1:10 magnification. Hence, a digital compact camera is good enough for most close-up shots.
[*Note: I use the word MACRO here is actually technically incorrect , as the actual defination for
macro is taking pictures with the magnification of greater than 1:1. The right term for magnification less than 1:1 should be CLOSEUPphotography]
 Fact:
Fact: Results achievable with a compact digital camera in macro mode probably comparable with macro lens on dSLR. I've shot remarkably good pictures [to my own sub-standard
lah..] with compact cameras. All my closeup shots [click
here to view] were taken with a compact camera.
___________________________________________
CLOSEUPphotography tips
Tip #1: Turn on the ignition key.....
On compact digicams there is Macro Mode [some digicams have Super Macro Mode for up to 1:1 magnification] - "Believe it or Not" many digital camera owners do not aware the shooting modes that their camera has. Macro mode is symbolized with a little flower.
Tip #2: Always use a Tripod. Even top pros use tripods if not
monopods
In macro photography a tripod is a necessity if u don't have a hot shoe and an external electronic flash unit - technically speaking built in flash is not suitable for "macro" as there is parallax. Keeping your camera rock-steady not only preventing of camera shake but you can play around with different settings and exposure value [EV] without losing your composition.
Tip #3: Use everything MANUAL whenever possible
If your camera has Manual modes you can play with aperture settings - it is 'wajib' to do so. The bottom line is that aperture impacts is the depth of field of your shots. Taking closeup or macro shots with shallow depth of field will make the main object stand out of crowd. Contrasty-Coloful out of focus background gives an additional impact on the captured images. Never choose a high f-number [small aperture] - select the f-number adjacent to the largest aperture available.
It is also important to have manual focusing, or fix focusing - In closeup or macro photography it is easier to move the camera forward or backwards than try to focus the image on CCD, especially when the camera focussing is done by wire, i.e non-mechanicals.
For those with all-AUTO compact digicams [difficult to focus on flat objects of insufficient contrast] may overcome the
macro focusing problem by first pointing and focusing the image on onother object of high contrast with clear diagonal lines at approx. the same object-to-camera distance with the actual object to be captured. After sharp focus is achieved, lock it [i.e keep half-depressing the shutter], then slowly point to the actual object of interest, move the camera forwards or backwards until sharp focus is achieved. Click the shutter. View the captured image. Repeat. Do neccessary adjustments [such as EV compansation, distance, composition, etc..] for best results.
Tip #4 Don't break the rule!
Rule of Thirds must be obeyed here. The image must have the main focus point of interest to draw the attention of curious onlookers. Always select a simple but contrasting background for the main object. In closeup or macro shots, background is also very important.
 Tip #5 Lights
If your camera has hot-shoe for external flash try diffuse using paper or whatever over the flash or get a reflector gather the most of light available. DIY with different types of lighting technique is recomended. If u and ur camera does not have 'macro flash capability' natural light is important hence selecting a suitable time of day for sufficient light is a must.
Tip #6 Get 'em!
After you have your shot take a look on your LCD, make sure that the picture is sharp. Repeat shooting at different apertures, compositions and focusing to get the best results.
Tip #7 Accessories and Attachments
Compact Digital Cameras also have accessories and attachments to enhance picture takings . Get them if u have enough allocation.
[to be continued...]
____________________________________________
CLOSEup and MACROphotography FAQ
Q. Close-up -
What's UP?
Close-up photography is simply positioning the camera very close [normally at the minimum-focus distance] to the object being photographed by using prime or zoom lenses - a closeup
filter is normally attached in front to minimise focusing distance hence increase magnification. In close-up photography the magnification is in the range of 1:1 to 1:10
Q. What is Magnification?
The magnification is the ratio of the image size on CCD [or film - not the displayed or printed image size] against the real-life dimension being captured.
Q. How to determine Magnification?
In real life the vertical measurement of the RM10 note captured by the CCD was 54mm. Hence the magnification is 24:54 or about 1:2. This picture is a close-up photo, not macro.
 Q. What is the dividing line between Close-up and MacroPhotography?
Photomacrography or commonly called MACROphotography makes the image captured on CCD [or film] larger than real life-size. The dividing line between close-up and macro is a magnification of 1:1, at which the the image is exactly the same size as the subject or life-size.
The picture shown below measures only 12mm high in real life was captured on CCD. Therefore the magnification is 24:12, i.e 2:1 and hence qualifies for macro category.
 Q. What is the difference between Macro and Micro Photography?
By now the term MACROphotography should be fully understood. But do not get mixed up with MICROphotography or
PhotoMICROscopy. The letter "A" and "I" in the spellings have different meanings... [in some countries they sound almost the same though]. Photomicrography is taking pictures through microscopes for very high magnification, and is more technical than art of taking picture. Whereas Macro Photography is an
art with a little bit of
technical touch ...
Sample of MACROphotographs
shot with
Zuiko Digital 35mm f3.5 Macro lens
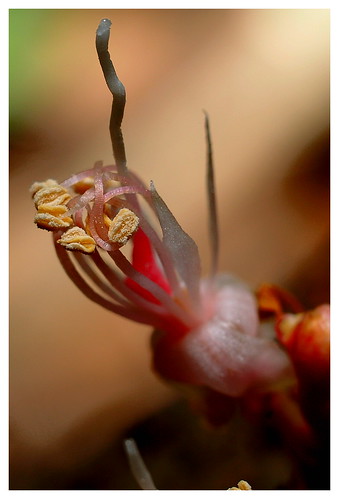
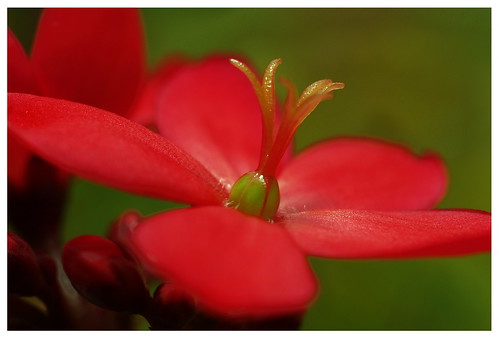
ZD Macro 35mm f3.5 @ 1/30sec f9.5 ISO100. This picture shows stamens with pollen grains of
buah 6-6 or
buah katakpuru flower. The size of this cluster is approximately 4 to 5mm.
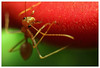
This spider L-R 'footprints' measures only 8mm across, almost unnoticed to naked eyes. The cephalotorax alone is much smaller than the head of a match-stick. I have to take position about 30mm between the surface of lens filter to the
arachnida.
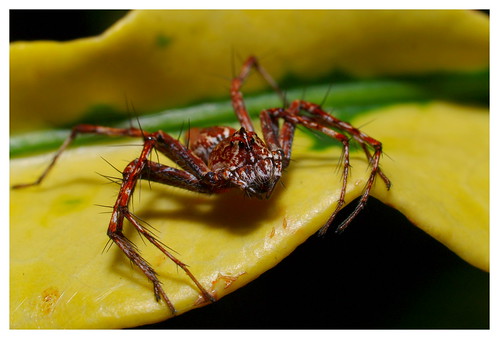 ZD Macro 35mm f3.5 @ 1/180sec f16.0 ISO100 [3:1]
Vertical life-size dimension is only 8mm , hence magnification is 24:8, i.e 3:1
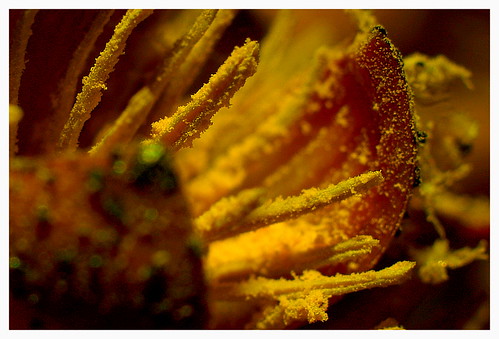 ZD Macro 35mm f3.5 @ 1/60sec f11 ISO100 [3:1]
Q. Can a "Point and Shoot" Digital Camera take macro shots?
Point and shoot digital cameras can have remarkable macro capabilities, but for best results you want a dSLR camera. These allow you to attach special-purpose macro lenses and show you in a bright optical viewfinder what you will get on the CCD.
For instance, an
entry-level macro lens with maximum aperture of f3.5 costs more than the prices of most 6MP compact digital cameras with 'macro' capability, and a
slightly better macro lens such as
ZD 50mm f2.o ED may cost double. Investment on special flash unit will swallow a large chunk of budget too.
In general, buying a dSLR with bundled lenses is just one-half of the procument!. That's what a dSLR is all about. Be prepare to spend on lenses and accessories... probably RM10k is
good enough for a beginner, otherwise just stick to a compact digicam or a prosumer digicam.
Click
here to see some decent near-macro shot with a compact prosumer digital camera.
___________________________________________
Q. What photography is all about?
The word "Photography" actually covers so many topics of great interest:-
hardware, software
photographers, techniques
subjects, locations, events
lights, time, tides, moods, weather
etc.
Freezing the Transients
In short, Photography is the process of transforming from trasient to timeless event.
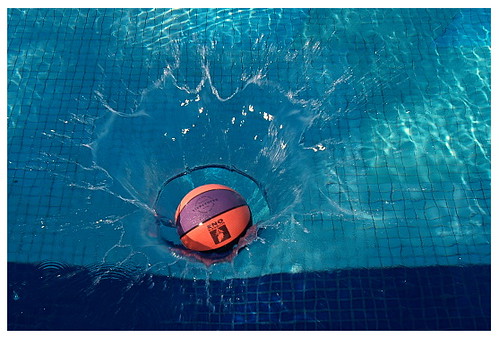
Olympus E-500 with ZD14-45mm f3/5/5.6 @ f6.3 1/125 ISO100
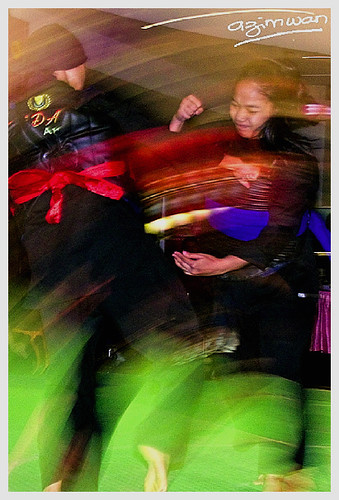
Great pictures are not necessarily best in term of quality. Sometimes blurred, shaky, B&W images have more values than studio like sharp, beautiful and coloful photos finish. The following photo, shot by my son, K. A. Wan was published in
Digital Camera Magazine Issue 17 supports my views indeed...
 Olympus E500 with ZD 40-150mm f3.5/4.5 @ f16 1/8 sec ISO100
___________________________________________
BACK to the BASICS
The very basic about picture taking
-focus the image
-set exposure of light i.e EV
-capture images by clicking the shutter
However, the canny wizard in photographic industry have simplified the art of taking pics so the only requirement imposed on the photographer is just clicking the shutter. The hidden processes are left unnoticed to the CPU in the camera. U can take pictures like this...... but the result is usually average pictures of average scene. If u r lucky enough u may get good or great shot by chance, but "photography" in real sense does not rely on luck! Knowledge and skill must be developed for great picture taking. Some level of understanding beyond clicking the shutter is required to take picture that are more satisfying.... simply means that ur picture fulfills the purpose u had in mind when u took it.
Q. What are the processes?
The lens admits light from the object of interest. As soon as the shutter is opened, image-forming light is allowed to fall on the surface of CCD or CMOS (equivalent to film surface in 'ancient camera') .
Next is the
exposure - i.e the the 'dose' of light received by the CCD which depends on the light intensity (aperture) and the duration (shutter speed). The light intensity is determined by 'iris' opening (or aperture) that we call
f-number or
f-stop which indicates of "how much" light the lens transmits to the CCD. Shutter speed is the duration during which light is allowed in the prosess of capturing particular image.
The digital camera now dominates the mass market, its manufacturing development is highly sophisticated, and constant improvement in design make it easier to handle yet more accurate and versatile. Photography is now so simple and so immediately gratifying that for millions of ppl it has become the most popular means of self-expression. However knowledge and experience will change the great pictures u shot from mere 'luck' to masterpiece.
Actually my interest is in NATUREphotography [incl. wild animals, Insects, flowers, earth, water, wind and fire]...as well as MACROphotography.
by courtesy of K. A. Wan
___________________________________________